
12.Sep.2023
In this article, we will talk about an application we made with OpenAI.
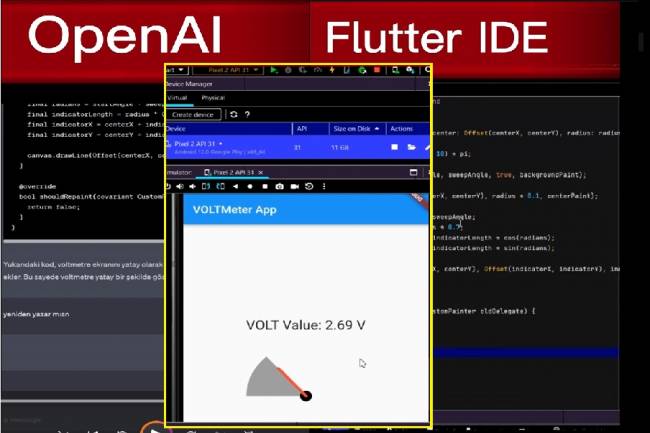
We wanted to make an application with Flutter-Dart. We got help from OpenAI while coding.
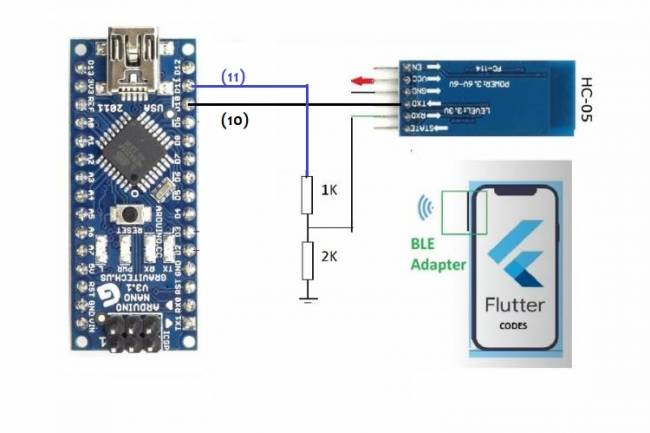
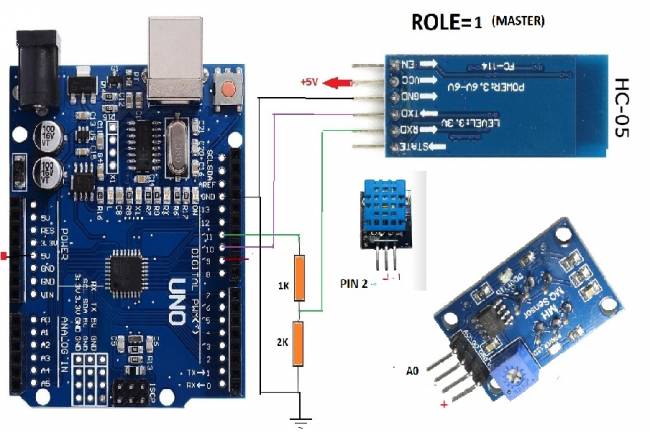
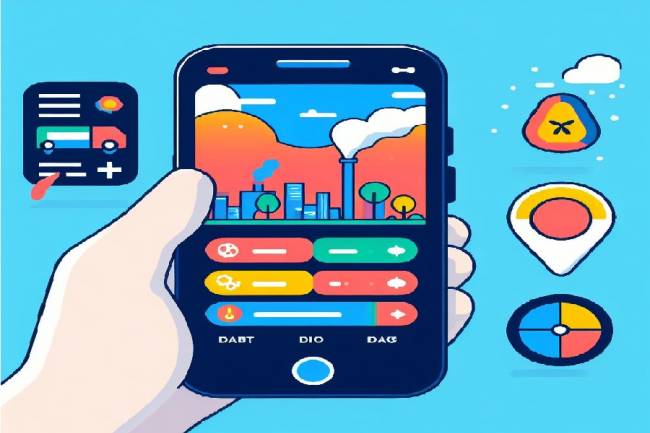
This application is a graphical interface application. We thought that a microcontroller system was set up for volt measurement. We wanted to show how the digital data coming to the mobile application via Bluetooth or Wifi module is visualized.
We have previously made bluetooth and wifi applications on our site and youtube channel. Among our Bluetooth applications, we have shown how to receive data from an MCU system with a mobile application.
Link: Measuring DC Volts with Android Phone - Voltmeter
In our current application, numerical values (volt values) are generated randomly. Every 2 seconds, these numerical data are reflected on the graphic screen.
Flutter-Dart codes are below. These codes are easily understandable when examined block by block.
import 'dart:async';
import 'dart:math';
import 'package:flutter/material.dart';
void main() {
   runApp(MyApp());
}
class MyApp extends StatelessWidget {
   @override
   Widget build(BuildContext context) {
     return MaterialApp(
       home: Scaffold(
         appBar: AppBar(
           title: Text('Horizontal Voltmeter Application'),
         ),
         body: Center(
           child: VoltmeterApp(),
         ),
       ),
     );
   }
}
class VoltmeterApp extends StatefulWidget {
   @override
   _VoltmeterAppState createState()=> _VoltmeterAppState();
}
class _VoltmeterAppState extends State<VoltmeterApp> {
   double _voltageValue=0.0;
   Timer? _timer;
   @override
   void initState() {
     super.initState();
     _startTimer();
   }
   @override
   void dispose() {
     _timer?.cancel();
     super.dispose();
   }
   void _startTimer() {
     // Starts a timer that produces random voltage values at certain intervals.
     _timer=Timer.periodic(Duration(seconds: 2), (timer) {
       final randomValue=Random().nextDouble() * 10; // random voltage value between 0 and 10
       setState(() {
         _voltageValue=randomValue;
       });
     });
   }
   @override
   Widget build(BuildContext context) {
     //Formats the voltage value as a two-digit fraction.
     final formattedVoltage=_voltageValue.toStringAsFixed(2);
     return Column(
       mainAxisAlignment: MainAxisAlignment.center,
       children: [
         Text(
           'Voltage Value: $formattedVoltage V',
           style: TextStyle(fontSize: 24),
         ),
         SizedBox(height: 20),
         Voltmeter(_voltageValue),
       ],
     );
   }
}
class Voltmeter extends StatelessWidget {
   final double voltage;
Voltmeter(this.voltage);
   @override
   Widget build(BuildContext context) {
     return Center(
       child: SizedBox(
         width: 200,
         height: 100, // Decreases the height for horizontal display.
         child: Row(
           children: [
             Transform.rotate(
               angle: pi, // Flips the graph horizontally.
               child: CustomPaint(
                 painter: VoltmeterPainter(voltage),
               ),
             ),
           ],
         ),
       ),
     );
   }
}
class VoltmeterPainter extends CustomPainter {
   final double voltage;
VoltmeterPainter(this.voltage);
   @override
   void paint(Canvas canvas, Size size) {
     final centerX=size.width / 2;
     final centerY=size.height / 2;
     final radius=min(centerX, centerY);
     final backgroundPaint=Paint()
       ..color=Colors.grey
       ..style=PaintingStyle.fill;
     final centerPaint=Paint()
       ..color=Colors.black
       ..style=PaintingStyle.fill;
     final indicatorPaint=Paint()
       ..color=Colors.red
       ..style=PaintingStyle.fill
       ..strokeCap=StrokeCap.round
       ..strokeWidth=10.0;
     final rect=Rect.fromCircle(center: Offset(centerX, centerY), radius: radius);
     final startAngle=0; // Sets the starting angle to 0.
     final sweepAngle=(voltage / 10) * pi;
canvas.drawArc(rect, startAngle, sweepAngle, true, backgroundPaint);
canvas.drawCircle(Offset(centerX, centerY), radius * 0.1, centerPaint);
     final radians=startAngle + sweepAngle;
     final indicatorLength=radius * 0.7;
     final indicatorX=centerX + indicatorLength * cos(radians);
     final indicatorY=centerY + indicatorLength * sin(radians);
     canvas.drawLine(Offset(centerX, centerY), Offset(indicatorX, indicatorY), indicatorPaint);
   }
   @override
   bool shouldRepaint(covariant CustomPainter oldDelegate) {
     return false;
   }
}

Mobile programming Fundamentals for Control Applications
Fundamentals of mobile application development for control of electronic systems
05.04.2023

With the Flutter-Dart language, can we write an artificial intelligence program that takes a picture and lists the objects in it?
Flutter-Dart language, artificial intelligence program
06.04.2023
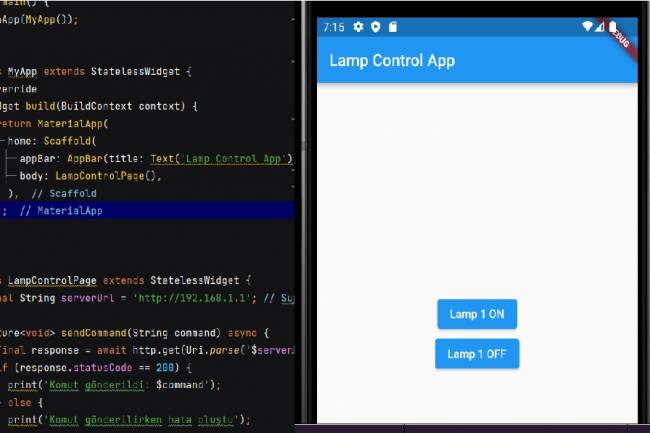
Writing Applications that control Electronic Devices with Flutter-Dart Programming Language
Controlling Electronic Devices remotely
06.04.2023
Controlling Wifi Devices with Flutter-Dart
Control of remote devices with Android apps, Wifi-based control applications
07.04.2023
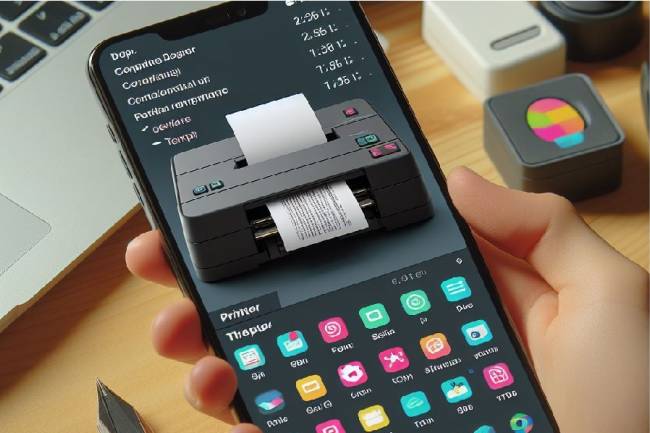
Developing an Application to Send Data to a Bluetooth-enabled Thermal Printer with Flutter
Mobile app developed with Flutter explains the step-by-step process of sending text to a Bluetooth-enabled thermal printer. Contains information about printer commands and Bluetooth communications
11.01.2024
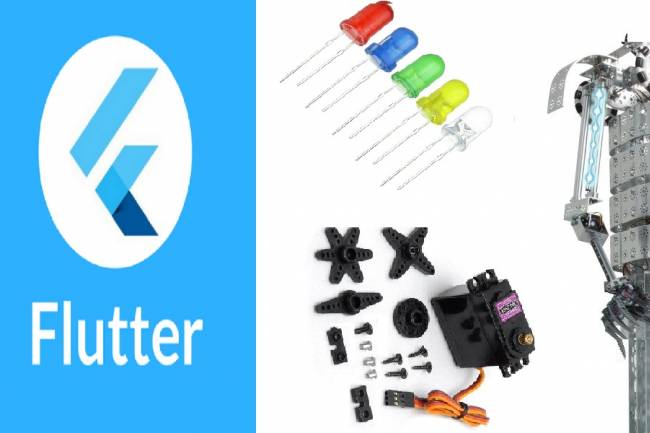
Application Development Example with Flutter and Arduino
Learn to connect mobile devices with embedded systems! In this article, learn step by step how to develop an app using Flutter and Arduino
01.03.2024
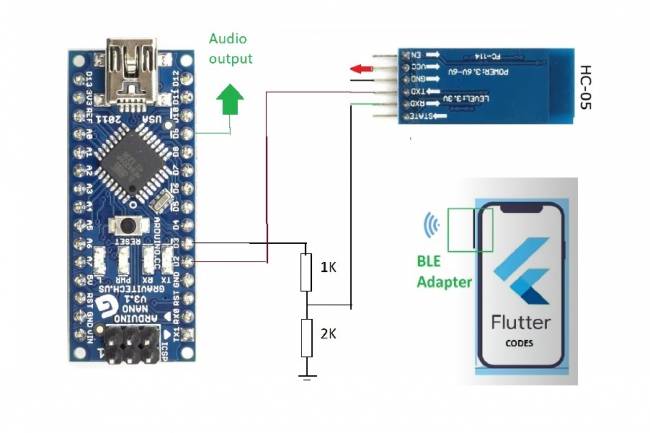
Bluetooth Speaker Project with Flutter - Audio data transfer
In this project we will try to understand how the Bluetooth speaker system is designed and how to develop it. We will examine the basics of Android programming, MCU programming-embedded system design.
24.07.2023
Extracting Data from Database and Creating Graphs with Flutter and PHP
Learn how to pull data from a database and create a line chart using Flutter and PHP
27.08.2023
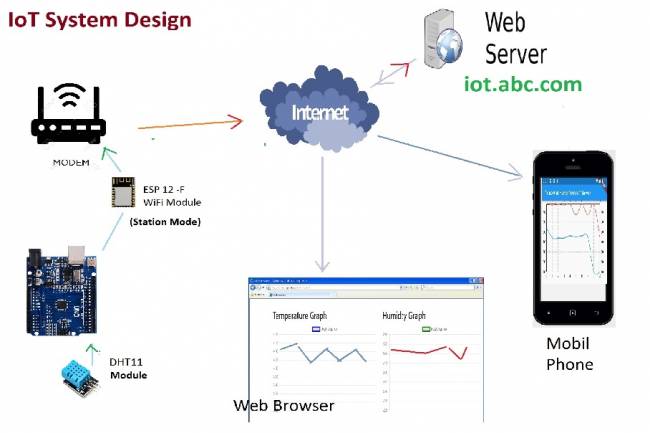
IoT System Design 1 – Temperature and Humidity Monitoring System
IoT system design with ESP 12f. Monitoring of temperature, humidity in web & mobile. Arduino, DHT11 sensor.
30.08.2023
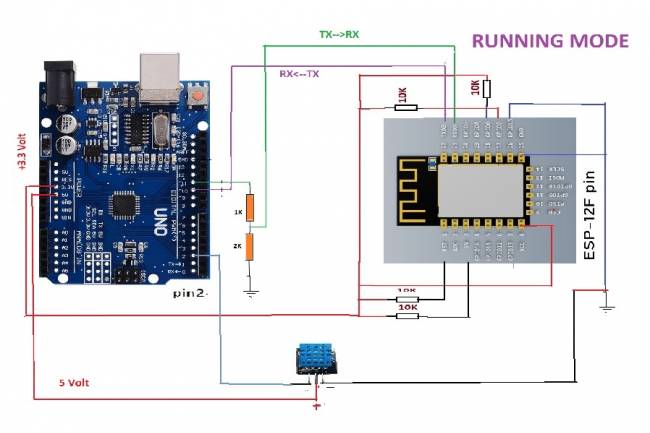
IoT System Design 2- Sending Temperature and Humidity Data to Web Server with Arduino
Learn the steps to send temperature and humidity data from DHT11 sensor with Arduino to web server via ESP 12f
30.08.2023
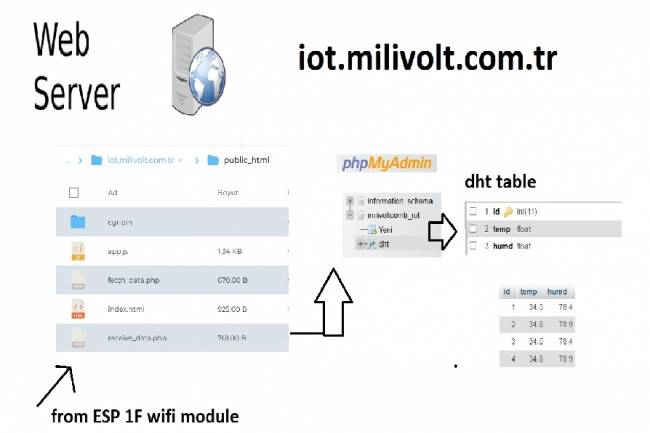
IoT System Design 3- Data Processing on the Web Server Side
Learn to transmit data from DHT11 sensor with Arduino to web server via ESP8266 and save it to database with PHP.
30.08.2023
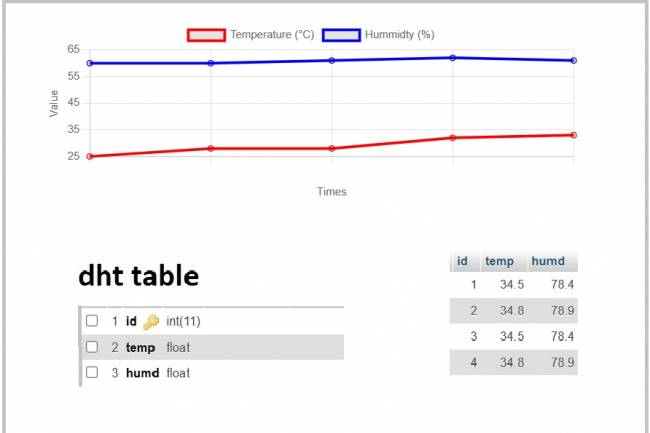
IoT System Design 4- Creating a Web Interface
Learn how data is pulled from the IoT system and used graphically.
30.08.2023
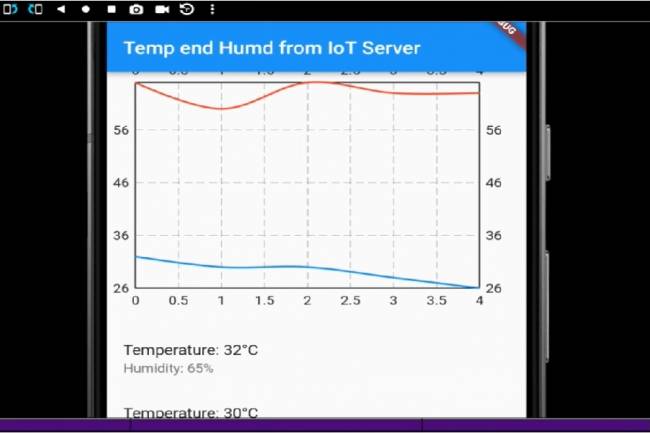
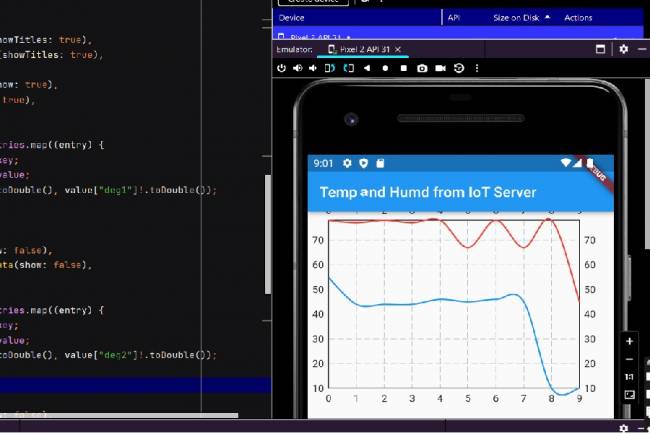
IoT System Design 5- Mobile Application Visualizing IoT Data with Flutter
Code descriptions of an application that pulls, graphs, and lists IoT data with Flutter.
30.08.2023
Mobile Application Development for Smart Homes
In this article, you can find the steps and examples of mobile application development using WiFi communication
01.09.2023
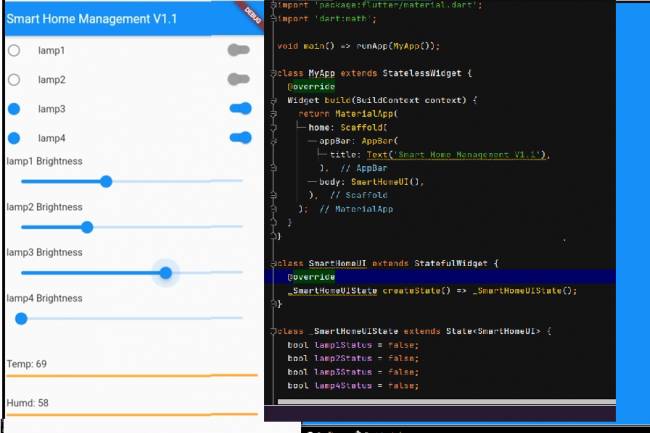
Mobile Application Interface Development Study for Smart Homes
Ways to develop mobile applications with Flutter for smart home and workplace systems
16.09.2023
Designing an Air Quality Measurement System 1 – Basic definitions of Air Quality
Air Quality Measurement System design and air quality parameters. PM2.5, CO, NO2, O3, SO2 measurement
02.10.2023
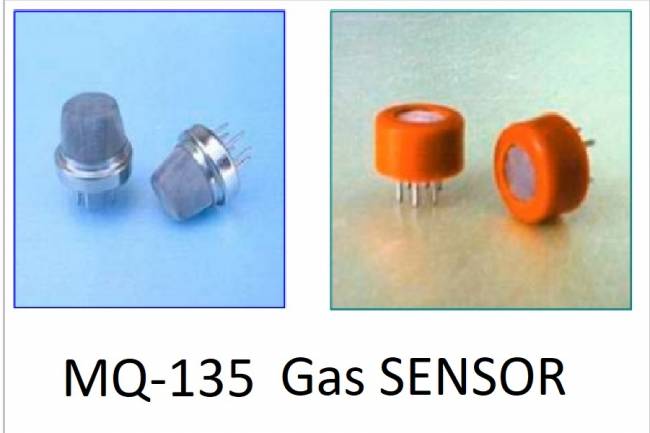
Designing an Air Quality Measurement System 2- MQ-135 Gas Sensor Review
MQ-135 Gas Sensor: A powerful sensor used to monitor air quality and detect gases. Offers precise measurement
02.10.2023
Designing an Air Quality Measurement System 3 - Measurement with MQ-135 and DHT-11
Designing an Air Quality Measurement System - Measurement with MQ-135 and DHT-11.
10.10.2023
Designing an Air Quality Measurement System 4 – Air Quality Monitoring Mobile Application
Air Quality Monitoring Mobile Application. Receive air quality data via Bluetooth, parse it in JSON format
10.10.2023